Flutter Animations: Part 5
Over this article series, we’ve been talking about the new cross-platform mobile development framework from Google called Flutter. We’ve reviewed a number of things including:
- Part 1 introduction of animations
- Part 2 implicit animations
- Part 3 transitions
- Part 4 advanced animations
In this article, we'd like to cover “Curved Animations” using the CurvedAnimation class. The CurvedAnimation class allows you to apply a non-linear Curve to an animation.
What is a non-linear Curve?
To get a complete and accurate answer, we’d have to dive into advanced mathematics. No worries, we're not going to here. However, if you are interested in the math behind animations, you can find a few courses at Khan Academy.
So, to give a five-cent—not 100 percent detailed—answer:
The animations we’ve covered so far were linear. In those animations, we moved a display element from point A to point B in a straight line at a consistent speed. This is called a linear Curve. With other “Curved Animations,” we still move from point A to point B. The difference is that it’s not always in a straight line and/or at a consistent speed. We can move elements in a fast to slow transition and/or with a bouncing motion.
Here are some examples:
To help us with our curved animations, Flutter provides us a simple class, called Curves. The Curves class provides us static properties that expose all the Curves that Flutter supports.
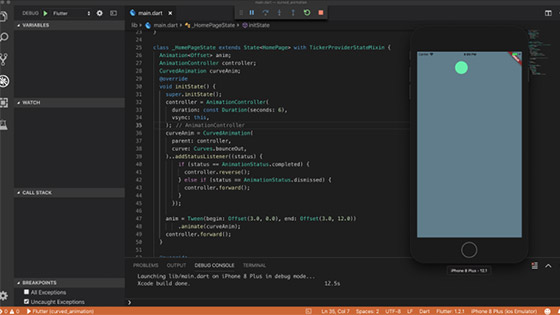
Let’s look at some code:
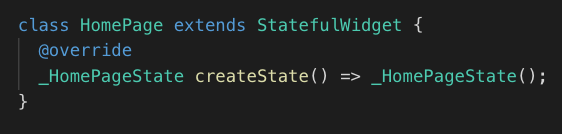
First: we create a StatefulWidget.
Next: we create our State class.
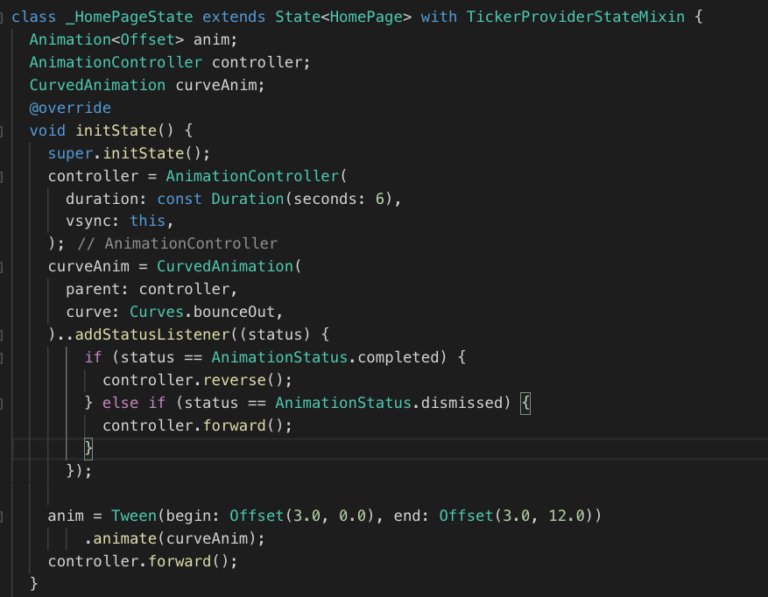
Let’s break down the code in our initState method:
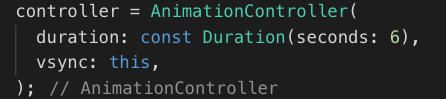
We first create an AnimationController. This is used to control the duration (6 seconds) of our animation and link it to our State Widget. The “vsync” property on the controller and the TickerProviderStateMixin mixin, on the class, prevents the animation from wasting resources if the Widget is not in the current display frame.
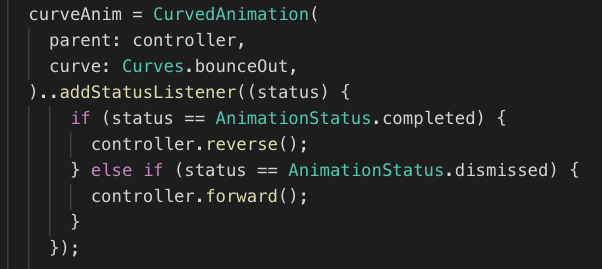
For the “Curved Animation,” we create a CurvedAnimation instance. We pass it the controller and the type of curve we want, using the Curves class. The “bounceOut” property provides us a Curve class that generates: “An oscillating curve that first grows and then shrinks in magnitude.”
To allow the animation to constantly run, we add a status listener (..addStatusListener). This allows us to have the animation move back (.reverse()) and forth (.forward()).

We connect our CurvedAnimation with our Tween animation by calling the .animate() method.
The animate method creates a new animation by combining our Tween animation object and our CurvedAnimation into a new animation object.
We start the animation by calling .forward(), on our controller.
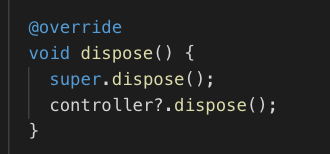
Don’t forget we always need to make sure we dispose our controller to prevent memory seeks.
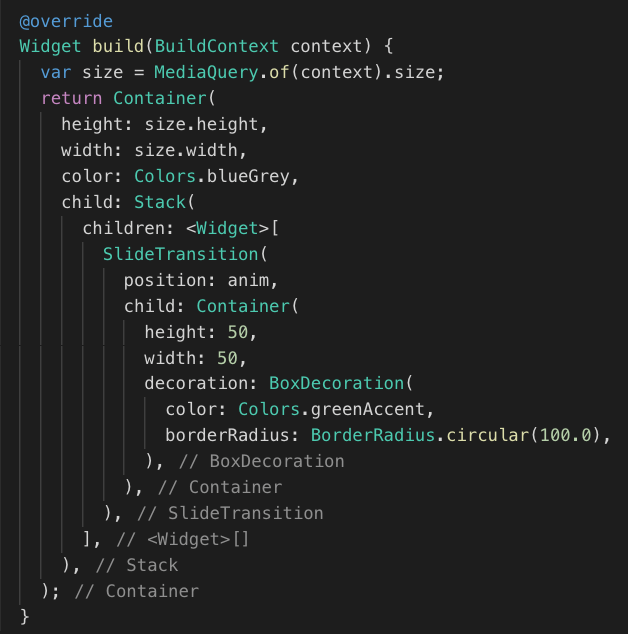
We use the animation on our SlideTransition Widget.
This will have the “circle” move back and forth from the top of the screen to bottom, with a little bounce in the process.
This video, click here, will show you what the animation looks like.
This blog series provided a brief overview of animations in Flutter. To learn more about Flutter, check out Scott’s “Flutter in Motion” video course at Manning Publications.